How To Weld Cast Iron And Avoid Weld Cracking
Cast iron is very challenging to weld, even for seasoned welders. But knowing how to weld cast iron opens up many opportunities for welders because parts made from cast iron are often expensive, and it's almost always more cost-effective to repair a casting than to replace it.
You'll typically find that the engine components like blocks, manifolds, heads, gearboxes, transmission cases, and other elements are made from cast iron, thanks to its immense hardness and rigidness.
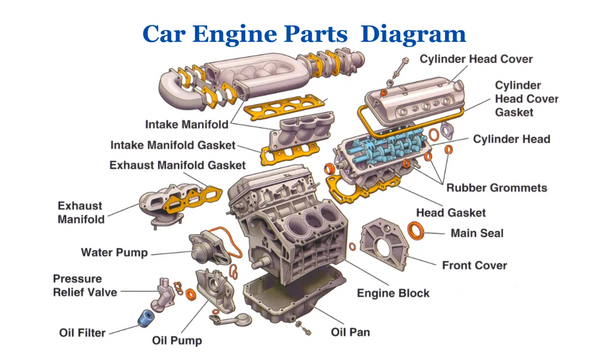
Source: https://www.partsofacarengine.com/
While cast iron is an excellent material for engine castings because it keeps its form when exposed to extreme pressures and temperatures, its enormous hardness is what makes it so difficult to weld.
Let's briefly touch on different types of cast iron before we explain how to weld this material and overcome the challenges of weld and base metal cracking.
Types of Cast Iron And Which You Can And Can't Weld
You can weld all cast iron types except white cast iron. But you are far more likely to see gray cast iron in most applications. Luckily, gray cast iron handles welding the best, but that doesn't mean welding it is easy.
Gray Cast Iron
Gray cast iron is the least challenging to weld. Its fracture surface is gray due to a significant amount of free carbon, which gives it its characteristic gray color. One particular issue with gray cast iron is its propensity to absorb oils into its surface due to porosive structure. We'll talk later about how embedded oils can interfere with the welding process and how to solve this issue.
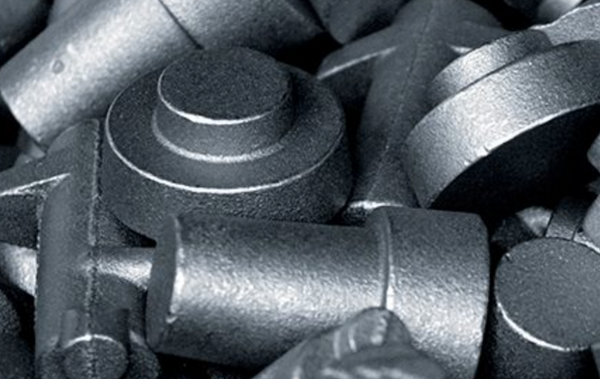
Gray cast iron
Source: https://www.acierdrummond.com/en/our-raw-metal/cast-iron/
Ductile And Malleable Cast Iron
Ductile and malleable cast irons are something "in-between" the gray and white cast irons. They are weldable, but both have specific heat requirements before, during, and after welding. For example, if the malleable cast iron is heated above its critical temperature of about 1700°F (925°C), the carbon will recombine with the iron and transform into white cast iron.
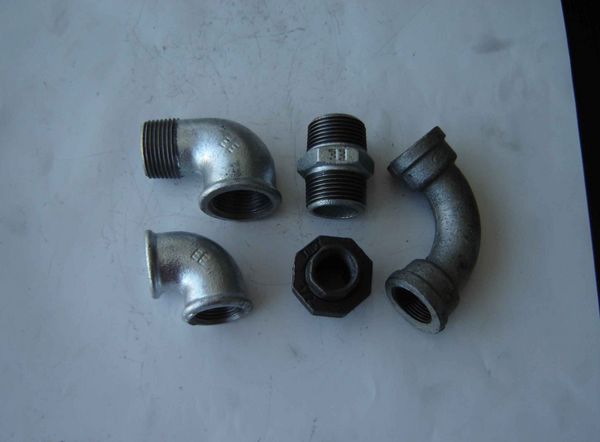
Malleable Cast Iron
Source: https://www.metallurgyfordummies.com/what-is-malleable-cast-iron.html
White Cast Iron
White cast iron is so hard and brittle that it's considered unweldable. This cast iron type simply doesn't have the necessary ductility to accommodate the welding stresses, which would always result in the weld cracks. The carbon atoms are combined with iron atoms into iron carbides, which produces its characteristic white fracture color, making it a bit easier to identify visually.
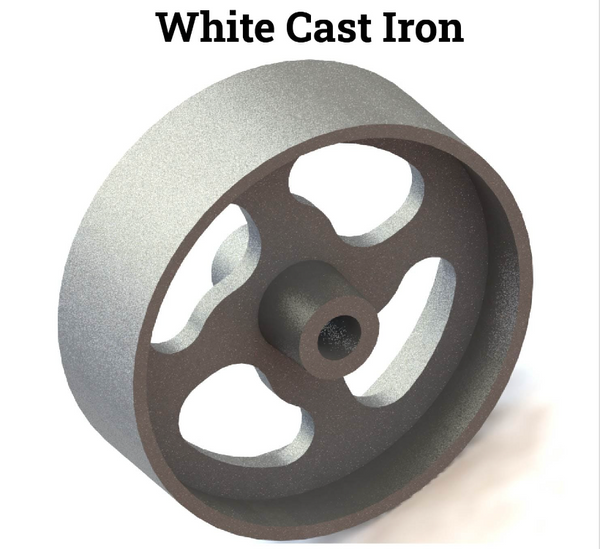
Source:https://www.iqsdirectory.com/articles/grey-iron-casting/iron-castings.html
Challenges of Welding Cast Iron - Why Your Welds Crack
In a nutshell, welding cast iron is difficult because the material is hard and brittle, and the welding process makes it even more brittle. The expansion and contraction forces in the weld zone can easily crack all cast iron types because they are not ductile enough to endure the welding-induced stresses.
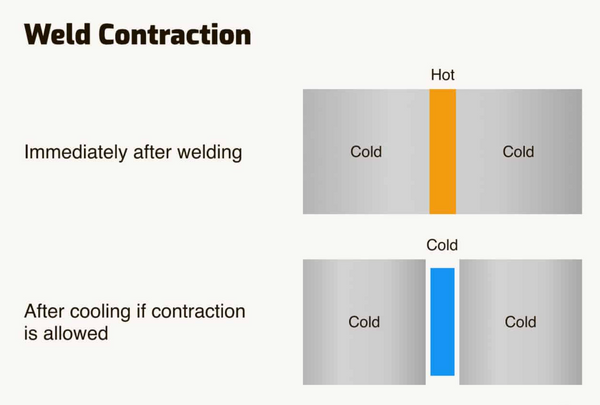
Source: https://weldguru.com/welding-cracks/
We will now focus on the gray cast iron for the rest of this guide since this is the cast iron type you are most likely to see in your welding career. While challenging, it's not impossible to master welding gray cast iron. So, let's dive deep into what makes it so difficult to weld and how to weld it like a pro every time.
What happens when you heat any metal? — It expands.
What happens when the metal cools? — It contracts back to its original dimension.
What happens when you try to bend typical mild steel? — It bends. It doesn't immediately crack.
What happens when you try to bend cast iron? — It cracks. It doesn't bend before cracking.
We hope you are starting to see the clear picture here.
If you weld a material like mild steel, the weld zone expands and pushes into the surrounding metal, which yields and accommodates that expansion. Once the weld starts cooling down, it starts pulling the surrounding material, and the mild steel yields again and allows the surrounding metal to slowly realign itself with the weld that's pulling it as it cools down and contracts.
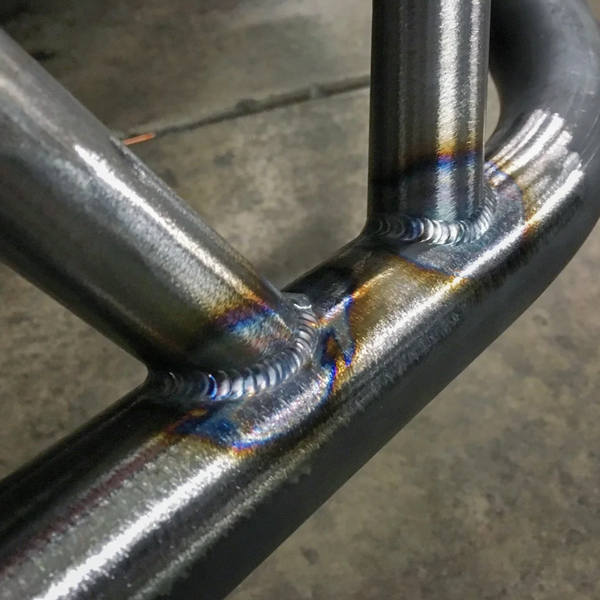
Mild steel welding
Source:https://www.reddit.com/r/Welding/comments/7unfhy/mild_steel_can_look_pretty_too_heres_a_few_tube/
The mild steel is highly ductile, so it can "flex" and accommodate the material re-alignment on the molecular level and avoid cracking.
So, what does this process look like with cast iron?
When welding the cast iron casting, the weld zone expands and pushes into the surrounding metal. Cast iron can handle compression forces, so weld expansion is not an issue. However, once the weld starts cooling down, it begins to pull the surrounding material, and this is where things quickly take a turn for the worse. Cast iron is NOT ductile enough to handle such internal stresses, making it crack quickly, especially when cooled rapidly. DO NOT quench (cool with water) the welded cast iron parts; they will immediately crack. If you hear tinkling noises (like breaking thin icicles) coming from the welded cast iron element as it cools down, the weld and the heat affected zone (HAZ) is likely cracking internally, and the part needs to be re-welded by removing the compromised metal and welding it again.
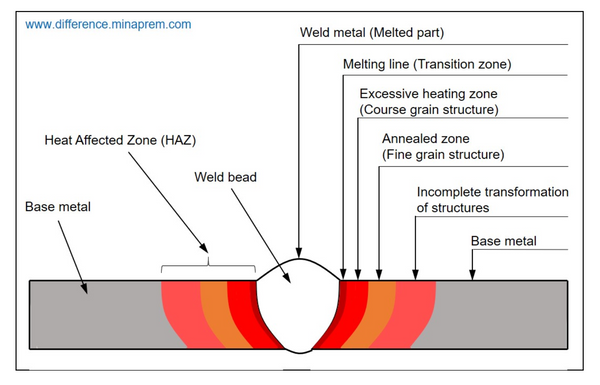
Source:https://www.difference.minaprem.com/joining/difference-between-weld-metal-and-heat-affected-zone-haz/
The welding process makes the HAZ even more brittle than the base metal was to begin with, which further complicates the already difficult welding conditions of cast iron. HAZ metal matrix transforms into a rigid, martensitic structure, making it far more brittle and easier to crack during the service life or after cooling.
How To Weld Cast Iron Like a Pro
While these challenges are difficult to deal with, it's not impossible to weld gray cast iron. And now, we'll discuss how to avoid most issues you'll face when welding this material and become the cast iron welding pro who can take on most cast iron repair jobs.
Welding Process Selection
We strongly recommend using the stick welding process to repair or join cast iron parts. While you can MIG and TIG weld cast iron, stick welding is the industry's go-to choice for a good reason.
The stick welding process produces a high-temperature arc that allows fast travel speeds and requires lower preheating temperatures than MIG and TIG welding. It's crucial to weld cast iron quickly, which is possible with the stick welding process. In addition, you can switch polarity to DCEN and reduce the HAZ and lessen the HAZ brittleness as a consequence of welding.
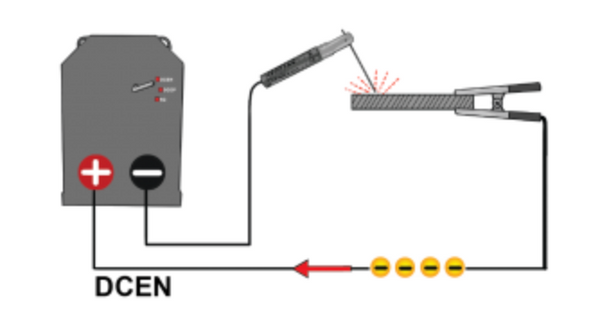
Source:https://awo.aws.org/glossary/direct-current-electrode-negative/
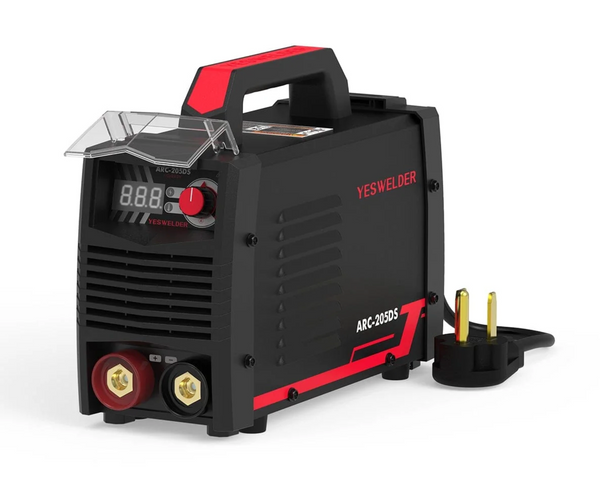
Cast iron is sensitive to input temperature fluctuations, so make sure that your stick welding machine has a reliable and consistent arc output. Take a look at the YesWelder welder selection, and feel free to reach out if you need help selecting your machine.
Stick Welding Machine ARC Welder 205A | YesWelder
How To Prepare The Casting And The Joint
Before we discuss filler metals and preheating, we must emphasize special preparation steps when welding cast iron parts.
The first thing you need to do is remove the casting skin over the entire welding area. Next, remove dye penetrants if they were used to test for weld cracks, and clean the surface from all oils, grease, paints, markings, etc.
We mentioned earlier that gray cast iron can soak in oil. So, it's essential to bake out the embedded oil before welding engine cast iron parts. Otherwise, the trapped oil and other compounds will burn during the welding process and emit gasses which will cause porosity. To prevent porosity, preheating the casting to temperatures above 260°C (500°F) is necessary. But we'll discuss preheating in far more detail soon.
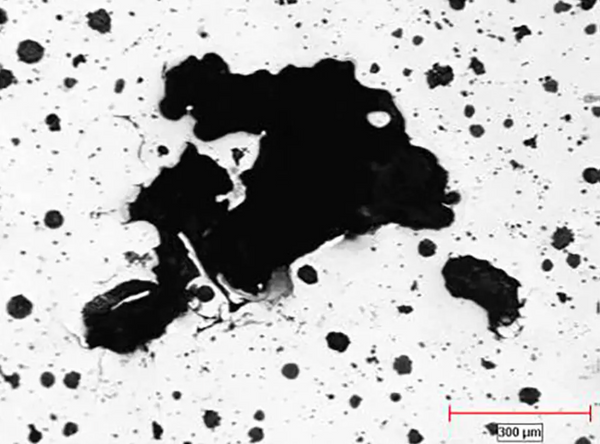
Original submitted iron sample is viewed at 100X: cast iron's porosity
Source:https://clemex.com/analysis/331-porosity-analysis/
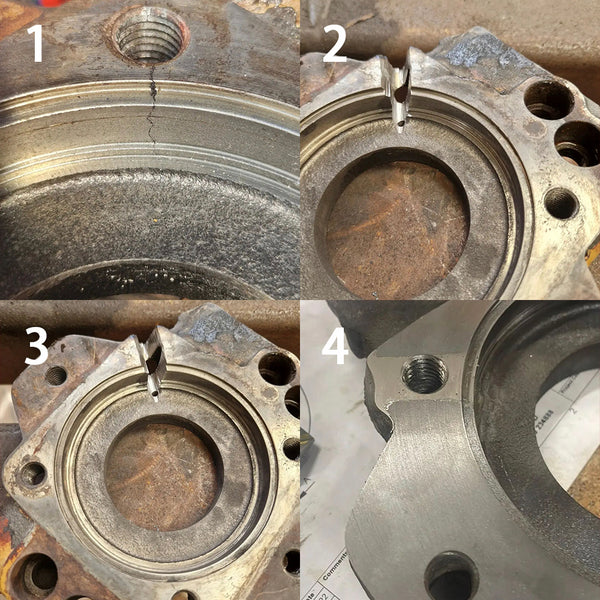
If you are repairing a crack on the cast iron part like an engine block, drill two holes at both ends of the crack to prevent the crack from spreading any further as you weld. Welding temperature will cause local expansion and contraction, as we discussed earlier, and since cast iron is very brittle, the crack will propagate unless you drill holes at both ends of the crack.

Source: https://www.youtube.com/watch?v=iyAykUm_Ykg
You should also consider using carbide tools to gouge out the crack to make a V or U shape before welding, but the need to do this will vary from case to case depending on the cast iron type, crack depth, and the service life conditions of the part you are repairing. To use common sense, consider if the part can serve its purpose if the weld is mostly a surface weld. If not, gouge out the crack to provide a deeper weld penetration.
If joining two cast iron parts into a butt joint configuration, it's best to make a U joint on both ends when possible.
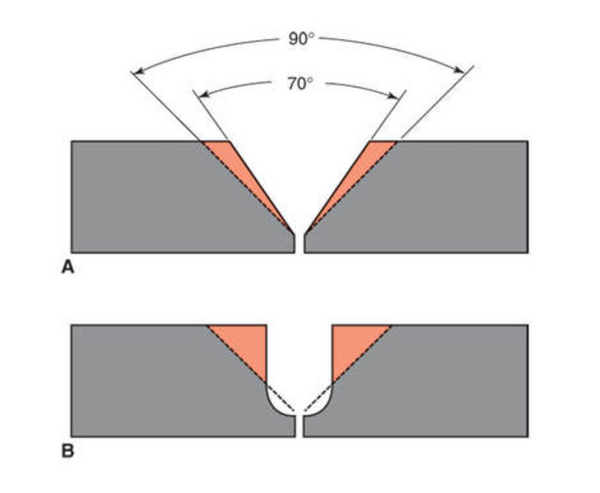
B—Look at the U-groove joint. The root of the weld can be reached easily. Little filler metal and welder time are wasted.
Source:https://www.halversoncts.com/33-joint-geometry.html
Preheating - CRUCIAL STEP
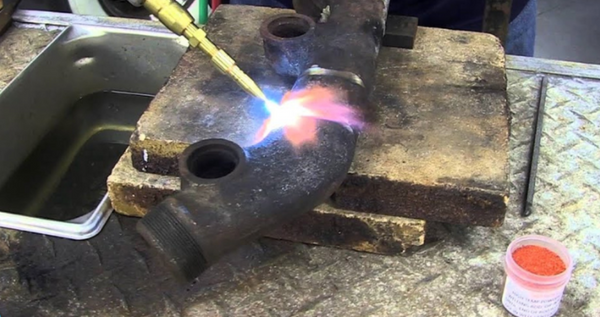
If there is one thing, you need to get right to successfully weld cast iron, that would be preheating. As we discussed earlier, cast iron is brittle and cannot handle the welding-induced stresses of weld zone expansion and contraction. However, preheating the casting before welding and letting it cool slowly will SIGNIFICANTLY improve your chances of joining or repairing cast iron parts.
As you weld, the HAZ will be constrained by the surrounding cold metal, which will cause cracking. However, if you preheat the whole part, there will be a significantly lower thermal gradient between the weld zone and the rest of the piece, resulting in far better chances of avoiding cracks as the material realigns during the cooling process.
Source: https://blog.thepipingmart.com/metals/how-to-weld-cast-iron-a-complete-guide/
But, there is a catch. You should preheat the casting evenly. If the thermal gradient over the entire part volume varies too much, the casting can crack even before welding.
Why, you may ask?
Well, here is the thing. If you heat one part of the casting at a higher temperature than the rest of the casting, that part will expand more and push into the surrounding material that has not expanded at the same rate. So now, when you try to heat the rest of the casting, there will be conflicting forces within the casting. Colder parts and hotter parts will push and pull on each other, causing the brittle cast iron to crack.
You don't have to be absolutely pedantic about it. But try your best to preheat the part evenly if using the oxy-acetylene rosebud, or put the piece in an oven or a covered grill if possible. In an industrial setting, cast iron parts would be preheated in industrial ovens, but for DIY repairs, you can use your home oven or a grill. Just be careful not to damage your appliances. If the part is large, you can use the rosebud oxy torch but try to cover it with even motions as you heat it.
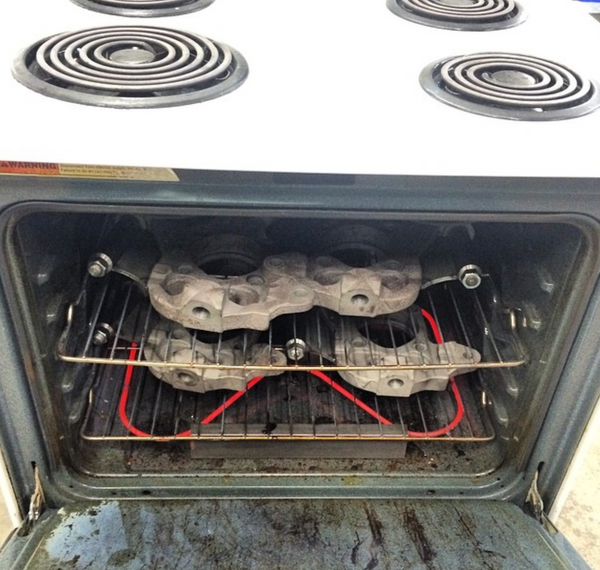
Photo by @littleshopmfg
If you are repairing industrial engines or other in-service equipment you cannot preheat because of size or other constraints, consider powering the equipment and running it until it reaches the maximum service temperature. While running a cracked engine is not the brightest of ideas, sometimes it's the best you can do. Use common sense and discuss how to handle such situations with others in the team. But keep in mind that the closer you get to the necessary preheating temperature, the better the chances of a successful weld. If you cannot preheat the part, the welds will be much harder and more likely to re-crack. But it's often far cheaper to repair industrial equipment and keep repairing it than to replace it, especially if the crack is not critical.
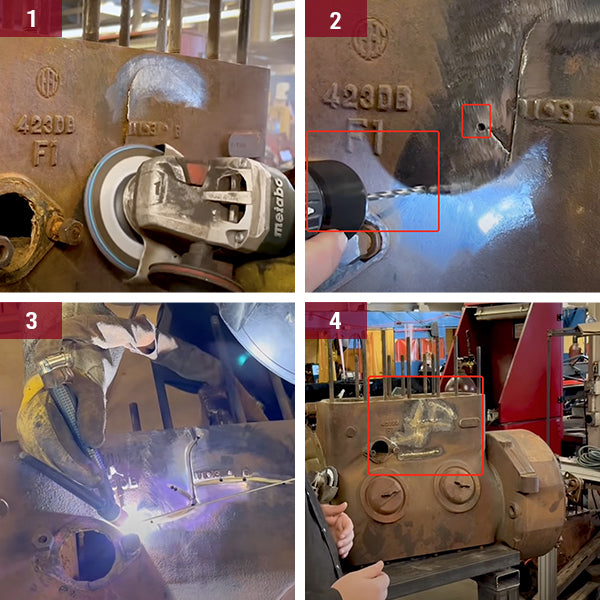
Cast iron engine block repair
Source: https://www.youtube.com/watch?v=iyAykUm_Ykg
Typical preheating temperatures for stick welding cast iron are between 600°F to 1500°F (315°C to 815°C), but try never to weld parts below 400°F (200°C). Heat the casting slowly. Don't go hellfire on it because it may expand too quickly on the surface but not fast enough deep in the metal and again cause conflicting forces making it to crack.
After welding, place the part in an enclosed metal box to slow down the cooling or cover it with sand or a welding blanket.
Filler Metal Selection
The next crucial step to avoid cracking is using the correct filler metal.
Here is the magic word for most cast iron repair jobs — Nickel. Now, you may be thinking, "Why on earth would you use nickel-based filler metal to weld cast iron?" The secret is… ductility and carbon content. Nickel-based rods dilute the weld with the base metal, making it significantly more ductile. In addition, Nickel rods like ENi-CI-A and ENiFe-CI-A have carbon content above the solubility limit in Nickel, which results in the increase of weld volume and helps offset the shrinkage stresses generated as the weld cools down. The Nickel rejects the solid carbon from the base metal, reducing the volume of cast iron diluted in the joint.
However, you must be careful when using the nickel-iron and nickel-iron-manganese electrodes because they may introduce more cast iron into the weld, which may result in transverse and centerline weld cracking in certain conditions.
When in doubt, we recommend using nickel-base stick electrodes. Of course, if you are welding expensive industrial equipment, consult the engineer and look for suitable filler metal for that specific cast iron alloy.

Nickel-base stick welding electrodes for cast iron
Source:https://www.weldpundit.com/what-welding-rod-cast-iron/
Laying The Welds That Stick Every Time
So you've cleaned, prepared, and preheated the casting, now let's see how to weld it with the best chances of avoiding weld cracks.
First, use the lowest amperage output on your stick welder that you can for the thickness of the welded part and the diameter of the nickel-based electrode. The lower the current you can use, the least heat you'll introduce into the HAZ. If you don't need maximum penetration, consider switching the polarity to DCEN (electrode negative, ground clamp positive) to reduce the HAZ. You can do this when making surfacing welds on worn cast iron parts that only require surface repair or to weld cracks where penetration depth is not a major concern.
Restrict the welds to 1-inch segments and never make welds longer than 10X the electrode's diameter.
If you are repairing a crack on the engine surface or something similar, start the weld on the casting surface slightly behind the drilled holes (which you drilled earlier, as we explained before in the article). Weld towards the center of the crack but don't make a weld longer than 1 inch. Repeat the process from the other side of the crack, and then weld from the center towards both welds. Staggering the welds like so will reduce the heat input into the weld zone and reduce the chances of HAZ turning martensitic and brittle.
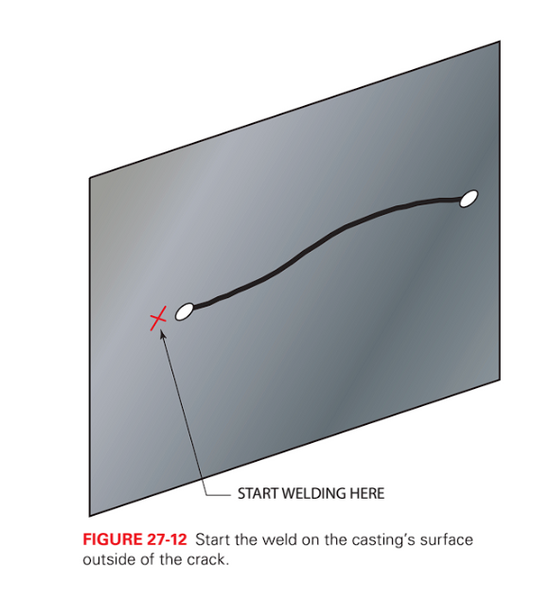
Image showing where to start the weld when repairing a casting crack.
Source: Welding: Principles and Applications, 8th ed.
Avoid re-striking on the base metal. Instead, re-strike the arc on the previously laid weld.
Consider grinding out areas of the casting with the carbide bits where you may get a high welding stress concentration and buttering in the area with the ductile welding material, like nickel-based electrodes, before joining two cast iron parts. For example, if you were to make a T-joint where one cast iron part is ground to form a 30-degree bevel to the other part, the other part would experience a lot of stress as the weld cools and pulls it towards the beveled part. But, if you grind out both parts and fill the weld groove with nickel-based filler metal, you would have better chances to avoid cracking because both parts are filled with ductile material.
So, try to imagine how the weld may pull the surrounding metal as it cools and see if you can locate the area that would benefit from being ground out and loaded with the ductile material to prevent stress concentration. This will be different for most jobs, depending on the joint type, thickness, shape of the part, and other aspects. But it's something to keep in mind before welding.
When welding thick V, U, or J, type joints, use a cascade welding sequence. First, lay the bottom first layer and then follow with cascading layers on top of it, as shown in the image below. Continue laying welds until you fill the joint. The cascade sequence should help in preventing overheating of the HAZ.
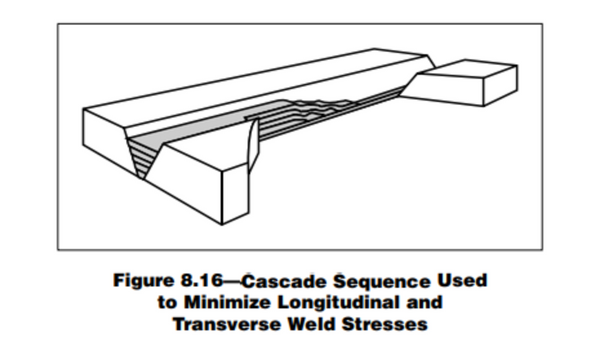
Image showing the cascade welding sequence. Image source AWS
Stress Relief
Ballpeen hammer will be your best friend when welding cast iron, not the electrodes, carbide tools, or your beloved welder.
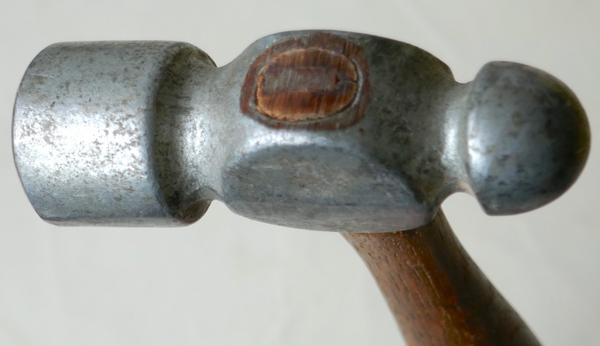
Ball-peen hammer
Source:https://en.wikipedia.org/wiki/Ball-peen_hammer
The peening technique involves applying numerous blows perpendicular to the weld surface using a rounded peening, ball-point hammer.
Hitting the weld bead as it cools will counteract the shrinkage forces and minimize the distortion and stress concentration. Quite literally, peeing the weld will push the weld metal into the surrounding metal and prevent the weld from pulling the surrounding metal. Combine peening with preheating and nickel-based electrodes, and you are golden.
The number one mistake to avoid is hitting the weld metal with too much force. In addition, you must maintain a temperature above 538°C (1000°F). So, as soon as you deposit the weld, start hammering it down while it's still warm. Don't wait for a second more than what it takes you to exchange the stinger for the hammer.
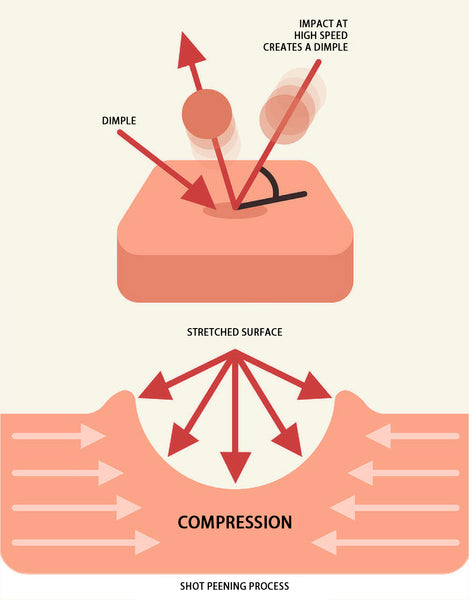
Source:https://www.weerg.com/guides/what-is-shot-peening
Finally, slowly cooling down the entire casting in the sand or an enclosed box will help relieve stress and minimize the chances of weld cracking internally or externally.
Conclusion
As you can tell by now, welding cast iron has many variables to consider and many critical steps, from baking out the embedded oil to peening the welds. It's not an easy material to work with, but if you learn how to do it and get the necessary cast iron welding certificates, you can broaden your work field. Few welders specialize in cast iron repairs, so you may open up some doors for your career if you like repairing industrial equipment.
When it comes to cast iron welding, practice makes perfect. Even if you wish to do DIY repairs on your cast iron stove or decorative ornaments, you should get different grades of cast iron scraps from your local scrapyard and make some test welds employing everything we discussed in this article. After a while, you'll get the hang of it and have higher chances of avoiding weld cracking during and after welding.




Leave a comment